4 posts tagged with "devops"

View All Tags

Operating Jenkins with Docker

· 3 min read

Overview

This article explains how to install and operate Jenkins using Docker.

Contents

Install

Docker

docker run --name jenkins-docker -d -p 8080:8080 -p 50000:50000 -v /home/jenkins:/var/jenkins_home -u root jenkins/jenkins:lts 

Mount a volume to persist Jenkins data on the host machine. Unlike TeamCity, Jenkins manages all configurations in files. Setting up a mount makes authentication information and data management much more convenient, so be sure to configure it. Common target paths are /home/jenkins or /var/lib/jenkins.

For the purpose of this article, it is assumed that the path /home/jenkins has been created.

Authentication

To ensure security and access control for both the master and nodes, create a user named 'jenkins' and proceed as follows.

Setting User Access Permissions

chown -R jenkins /var/lib/jenkins

Managing SSH Keys

If you don't have keys, generate one using ssh-keygen to prepare a private key and a public key.

When prompted for a path, enter /home/jenkins/.ssh/id_rsa to ensure the key is created under /home/jenkins/.ssh.

GitLab

In GitLab's personal settings, there is an SSH setting tab. Add the public key.

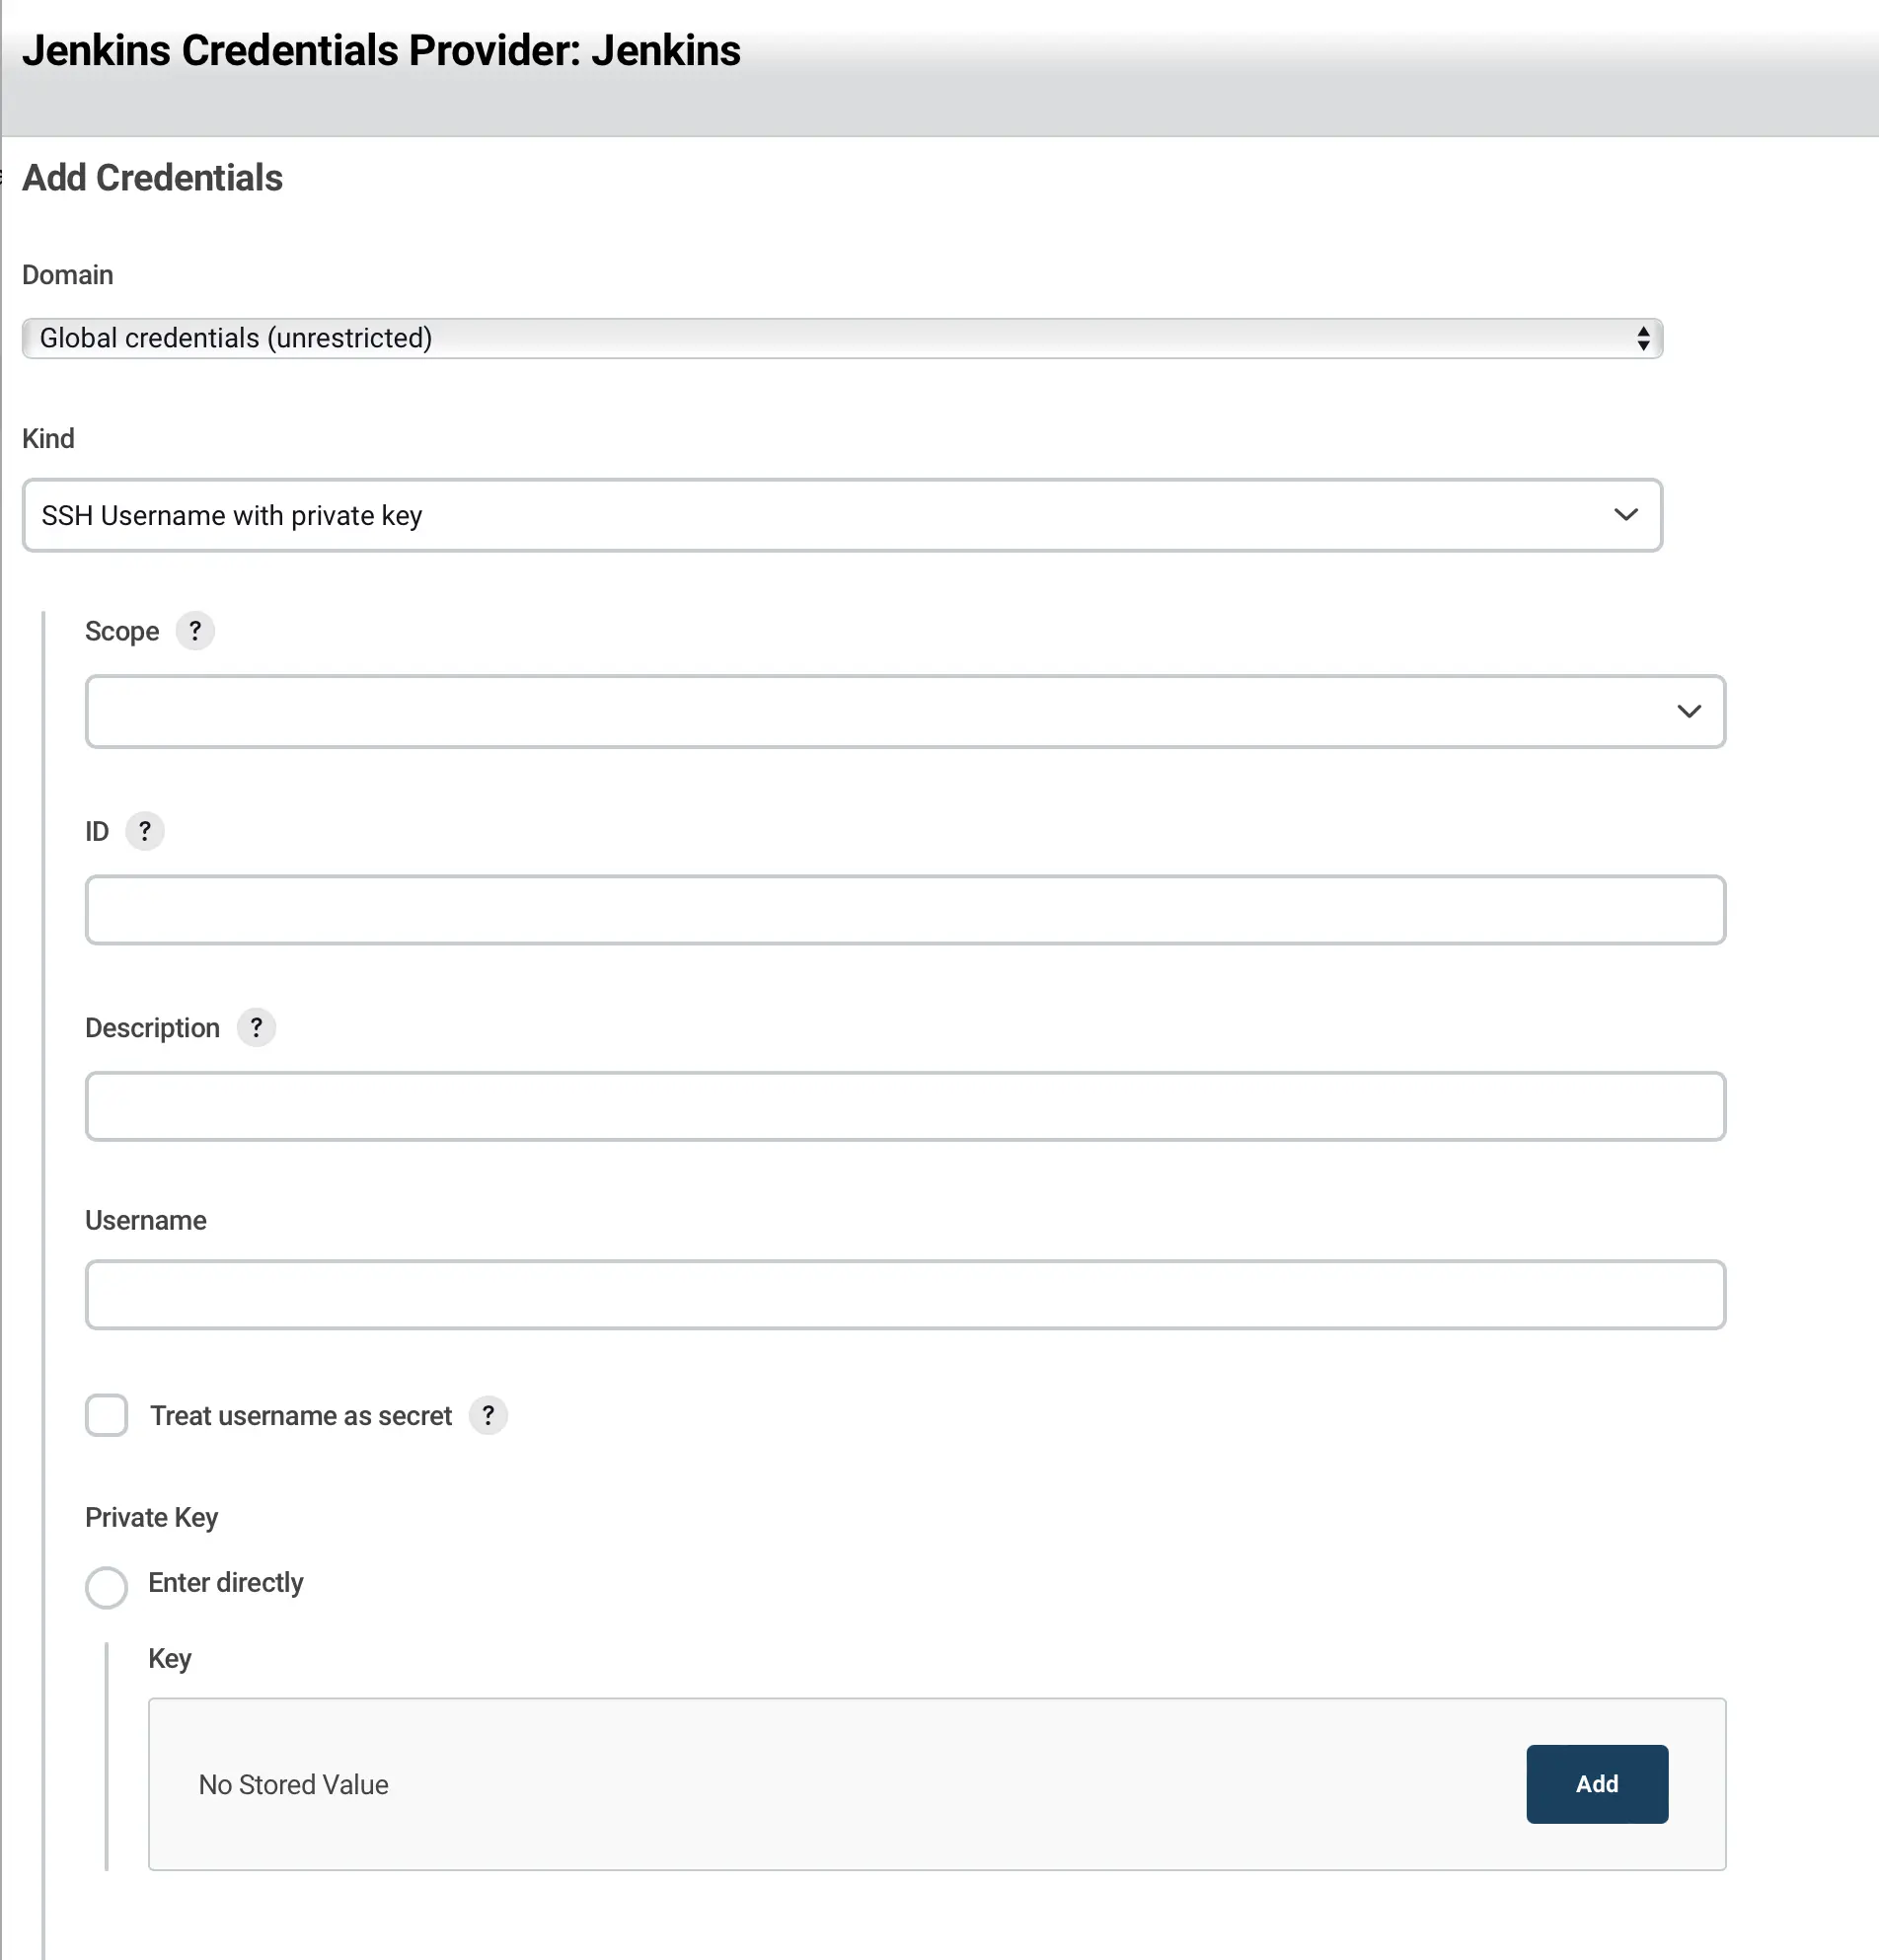
When selecting Git in the pipeline, a repository path input field is displayed. Entering an SSH path starting with git@~ will show a red error. To resolve this, create a credential. Choose SSH credential to create one, and the ID value can be a useful value, so it is recommended to enter it.

Node Configuration

Nodes are a way to efficiently distribute Jenkins roles.

To communicate with the node, generate a key on the master using ssh-keygen. If you already have one that you are using, you can reuse it.

image

  • ID: This value allows Jenkins to identify the SSH key internally, making it easier to use credentials in Jenkinsfiles, so it's best to set a meaningful value. If not set, a UUID value will be generated.
  • Username: The Linux user. Typically, 'jenkins' is used as the user, so enter 'jenkins'. Be cautious as not entering this may result in a reject key error.

Docker Access Permissions

If the docker group does not exist, create it. Usually, it is automatically created when installing Docker.

sudo groupadd docker

Grant Jenkins user permission to run Docker by running the following command.

sudo gpasswd -a jenkins docker
# Adding user jenkins to group docker
sudo chmod 666 /var/run/docker.sock

Restart the Docker daemon to apply the changes.

systemctl restart docker

You should now be able to run the docker ps command.

Restart

When updating Jenkins version or installing, removing, or updating plugins, Jenkins restarts. However, if you are managing it with Docker, the container goes down, preventing Jenkins from starting. To enable restart, you need to set a restart policy on the container.

docker update --restart=always jenkins-docker

After this, the jenkins-docker container will always remain in a running state.

Caution

When updating plugins, carefully check if they are compatible with the current version of Jenkins in operation. Mismatched versions between Jenkins and plugins can often lead to pipeline failures.

Reference

Managing Jenkins with Docker

Docker Network

· 6 min read

Overview

Since Docker containers run in isolated environments, they cannot communicate with each other by default. However, connecting multiple containers to a single Docker network enables them to communicate. In this article, we will explore how to configure networks for communication between different containers.

Types of Networks

Docker networks support various types of network drivers such as bridge, host, and overlay based on their purposes.

  • bridge: Allows multiple containers within a single host to communicate with each other.
  • host: Used to run containers in the same network as the host computer.
  • overlay: Used for networking between containers running on multiple hosts.

Creating a Network

Let's create a new Docker network using the docker network create command.

docker network create my-net

The newly added network can be verified using the docker network ls command, which confirms that it was created as a default bridge network since the -d option was not specified.

Network Details

Let's inspect the details of the newly added network using the docker network inspect command.

docker network inspect my-net
[
{
"Name": "my-net",
"Id": "05f28107caa4fc699ea71c07a0cb7a17f6be8ee65f6001ed549da137e555b648",
"Created": "2022-08-02T09:05:20.250288712Z",
"Scope": "local",
"Driver": "bridge",
"EnableIPv6": false,
"IPAM": {
"Driver": "default",
"Options": {},
"Config": [
{
"Subnet": "172.18.0.0/16",
"Gateway": "172.18.0.1"
}
]
},
"Internal": false,
"Attachable": false,
"Ingress": false,
"ConfigFrom": {
"Network": ""
},
"ConfigOnly": false,
"Containers": {},
"Options": {},
"Labels": {}
}
]

By checking the Containers section, we can see that no containers are connected to this network.

Connecting Containers to the Network

Let's first run a container named one.

docker run -it -d --name one busybox
# af588368c67b8a273cf63a330ee5191838f261de1f3e455de39352e0e95deac4

If the --network option is not specified when running a container, it will by default connect to the bridge network.

info

busybox is a lightweight command-line library ideal for testing purposes, officially provided by Docker.

docker network inspect bridge
#...
"Containers": {
"af588368c67b8a273cf63a330ee5191838f261de1f3e455de39352e0e95deac4": {
"Name": "one",
"EndpointID": "44a4a022cc0f5fb30e53f0499306db836fe64da15631f2abf68ebc74754d9750",
"MacAddress": "02:42:ac:11:00:02",
"IPv4Address": "172.17.0.2/16",
"IPv6Address": ""
}
},
#...
]

Now, let's connect the one container to the my-net network using the docker network connect command.

docker network connect my-net one

Upon rechecking the details of the my-net network, we can see that the one container has been added to the Containers section with the IP 172.18.0.2.

docker network inspect my-net
[
{
"Name": "my-net",
"Id": "05f28107caa4fc699ea71c07a0cb7a17f6be8ee65f6001ed549da137e555b648",
"Created": "2022-08-02T09:05:20.250288712Z",
"Scope": "local",
"Driver": "bridge",
"EnableIPv6": false,
"IPAM": {
"Driver": "default",
"Options": {},
"Config": [
{
"Subnet": "172.18.0.0/16",
"Gateway": "172.18.0.1"
}
]
},
"Internal": false,
"Attachable": false,
"Ingress": false,
"ConfigFrom": {
"Network": ""
},
"ConfigOnly": false,
"Containers": {
"af588368c67b8a273cf63a330ee5191838f261de1f3e455de39352e0e95deac4": {
"Name": "one",
"EndpointID": "ac85884c9058767b037b88102fe6c35fb65ebf91135fbce8df24a173b0defcaa",
"MacAddress": "02:42:ac:12:00:02",
"IPv4Address": "172.18.0.2/16",
"IPv6Address": ""
}
},
"Options": {},
"Labels": {}
}
]

Disconnecting a Container from the Network

A container can be connected to multiple networks simultaneously. Since the one container was initially connected to the bridge network, it is currently connected to both the my-net and bridge networks.

Let's disconnect the one container from the bridge network using the docker network disconnect command.

docker network disconnect bridge one

Connecting a Second Container

Let's connect another container named two to the my-net network.

This time, let's specify the network to connect to while running the container using the --network option.

docker run -it -d --name two --network my-net busybox
# b1509c6fcdf8b2f0860902f204115017c3e2cc074810b330921c96e88ffb408e

Upon inspecting the details of the my-net network, we can see that the two container has been assigned the IP 172.18.0.3 and connected.

docker network inspect my-net
[
{
"Name": "my-net",
"Id": "05f28107caa4fc699ea71c07a0cb7a17f6be8ee65f6001ed549da137e555b648",
"Created": "2022-08-02T09:05:20.250288712Z",
"Scope": "local",
"Driver": "bridge",
"EnableIPv6": false,
"IPAM": {
"Driver": "default",
"Options": {},
"Config": [
{
"Subnet": "172.18.0.0/16",
"Gateway": "172.18.0.1"
}
]
},
"Internal": false,
"Attachable": false,
"Ingress": false,
"ConfigFrom": {
"Network": ""
},
"ConfigOnly": false,
"Containers": {
"af588368c67b8a273cf63a330ee5191838f261de1f3e455de39352e0e95deac4": {
"Name": "one",
"EndpointID": "ac85884c9058767b037b88102fe6c35fb65ebf91135fbce8df24a173b0defcaa",
"MacAddress": "02:42:ac:12:00:02",
"IPv4Address": "172.18.0.2/16",
"IPv6Address": ""
},
"b1509c6fcdf8b2f0860902f204115017c3e2cc074810b330921c96e88ffb408e": {
"Name": "two",
"EndpointID": "f6e40a7e06300dfad1f7f176af9e3ede26ef9394cb542647abcd4502d60c4ff9",
"MacAddress": "02:42:ac:12:00:03",
"IPv4Address": "172.18.0.3/16",
"IPv6Address": ""
}
},
"Options": {},
"Labels": {}
}
]

Container Networking

Let's test if the two containers can communicate with each other over the network.

First, let's use the ping command from the one container to ping the two container. Container names can be used as hostnames.

docker exec one ping two
# PING two (172.18.0.3): 56 data bytes
# 64 bytes from 172.18.0.3: seq=0 ttl=64 time=0.114 ms
# 64 bytes from 172.18.0.3: seq=1 ttl=64 time=0.915 ms

Next, let's ping the one container from the two container.

docker exec two ping one
# PING one (172.18.0.2): 56 data bytes
# 64 bytes from 172.18.0.2: seq=0 ttl=64 time=0.108 ms
# 64 bytes from 172.18.0.2: seq=1 ttl=64 time=0.734 ms
# 64 bytes from 172.18.0.2: seq=2 ttl=64 time=0.270 ms
# 64 bytes from 172.18.0.2: seq=3 ttl=64 time=0.353 ms
# 64 bytes from 172.18.0.2: seq=4 ttl=64 time=0.371 ms

Both containers can communicate smoothly.

Removing the Network

Finally, let's remove the my-net network using the docker network rm command.

docker network rm my-net
# Error response from daemon: error while removing network: network my-net id 05f28107caa4fc699ea71c07a0cb7a17f6be8ee65f6001ed549da137e555b648 has active endpoints

If there are active containers running on the network you are trying to remove, it will not be deleted.

In such cases, you need to stop all containers connected to that network before deleting the network.

docker stop one two
# one
# two
docker network rm my-net
# my-net

Network Cleanup

When running multiple containers on a host, you may end up with networks that have no containers connected to them. In such cases, you can use the docker network prune command to remove all unnecessary networks at once.

docker network prune
WARNING! This will remove all custom networks not used by at least one container.
Are you sure you want to continue? [y/N] y

Conclusion

In this article, we explored various docker network commands:

  • ls
  • create
  • connect
  • disconnect
  • inspect
  • rm
  • prune

Understanding networks is essential when working with Docker containers, whether for containerizing databases or implementing container clustering. It is crucial to have a good grasp of networking as a key skill for managing multiple containers effectively.

Reference
Docker Volume

· 4 min read

Overview

Docker containers are completely isolated by default, which means that data inside a container cannot be accessed from the host machine. This implies that the container's lifecycle is entirely dependent on its internal data. In simpler terms, when a container is removed, its data is also lost.

So, what should you do if you need to permanently store important data like logs or database information, independent of the container's lifecycle?

This is where volumes come into play.

Installing PostgreSQL Locally

Let's explore volumes by installing and using PostgreSQL in a simple example.

Without Using Volumes

1. Pull the Image

docker run -p 5432:5432 --name postgres -e POSTGRES_PASSWORD=1234 -d postgres

2. Connect to PostgreSQL

docker exec -it postgres psql -U postgres

3. Create a User

create user testuser password '1234' superuser;

4. Create a Database

create database testdb owner testuser;

You can also use tools like DBeaver or DataGrip to create users and databases.

When you're done, you can stop the container with docker stop postgres. Checking the container list with docker ps -a will show that the container is stopped but not removed.

$ docker ps -a
CONTAINER ID IMAGE COMMAND CREATED STATUS PORTS NAMES
5c72a3d21021 postgres "docker-entrypoint.s…" 54 seconds ago Exited (0) 43 seconds ago postgres

In this state, you can restart the container with docker start postgres and the data will still be there.

Let's verify this.

Using the \list command in PostgreSQL will show that the testdb database still exists.

postgres=# \list
List of databases
Name | Owner | Encoding | Collate | Ctype | Access privileges
-----------+----------+----------+------------+------------+-----------------------
postgres | postgres | UTF8 | en_US.utf8 | en_US.utf8 |
template0 | postgres | UTF8 | en_US.utf8 | en_US.utf8 | =c/postgres +
| | | | | postgres=CTc/postgres
template1 | postgres | UTF8 | en_US.utf8 | en_US.utf8 | =c/postgres +
| | | | | postgres=CTc/postgres
testdb | testuser | UTF8 | en_US.utf8 | en_US.utf8 |
(4 rows)

But what happens if you completely remove the container using the docker rm option?

After running docker rm postgres and then docker run again, a new container is created, and you'll see that the testdb and user are gone.

$ docker rm postgres
postgres
$ docker run -p 5432:5432 --name postgres -e POSTGRES_PASSWORD=1234 -d postgres
67c5c39658f5a21a833fd2fab6058f509ddac110c72749092335eec5516177c2
$ docker exec -it postgres psql -U postgres
psql (14.4 (Debian 14.4-1.pgdg110+1))
Type "help" for help.

postgres=# \list
List of databases
Name | Owner | Encoding | Collate | Ctype | Access privileges
-----------+----------+----------+------------+------------+-----------------------
postgres | postgres | UTF8 | en_US.utf8 | en_US.utf8 |
template0 | postgres | UTF8 | en_US.utf8 | en_US.utf8 | =c/postgres +
| | | | | postgres=CTc/postgres
template1 | postgres | UTF8 | en_US.utf8 | en_US.utf8 | =c/postgres +
| | | | | postgres=CTc/postgres
(3 rows)

postgres=#

Using Volumes

First, create a volume.

$ docker volume create postgres
postgres

You can verify the volume creation with the ls command.

$ docker volume ls
DRIVER VOLUME NAME
local postgres

Now, run the PostgreSQL container with the created volume mounted.

$ docker run -p 5432:5432 --name postgres -e POSTGRES_PASSWORD=1234 -v postgres:/var/lib/postgresql/data -d postgres
002c552fe092da485ee30235d809c835eeb08bd7c00e6f91a2f172618682c48e

The subsequent steps are the same as those without using volumes. Now, even if you completely remove the container using docker rm, the data will remain in the volume and won't be lost.

As mentioned earlier, for long-term storage of log files or backup data, you can use volumes to ensure data persistence independent of the container's lifecycle.

Conclusion

We have explored what Docker volumes are and how to use them through a PostgreSQL example. Volumes are a key mechanism for data management in Docker containers. By appropriately using volumes based on the nature of the container, you can manage data safely and easily, which can significantly enhance development productivity once you get accustomed to it. For more detailed information, refer to the official documentation.

Reference

Exploring Kubernetes

· 4 min read

What is Kubernetes?

Kubernetes provides the following functionalities:

  • Service discovery and load balancing
  • Storage orchestration
  • Automated rollouts and rollbacks
  • Automated bin packing
  • Automated scaling
  • Secret and configuration management

For more detailed information, refer to the official documentation.

There are various ways to run Kubernetes, but the official site uses minikube for demonstration. This article focuses on utilizing Kubernetes using Docker Desktop. If you want to learn how to use minikube, refer to the official site.

Let's briefly touch on minikube.

Minikube

Install

brew install minikube

Usage

The commands are intuitive and straightforward, requiring minimal explanation.

minikube start
minikube dashboard
minikube stop
# Clean up resources after use
minikube delete --all

Pros

Minikube is suitable for development purposes as it does not require detailed configurations like setting up secrets.

Cons

One major drawback is that sometimes the command to view the dashboard causes hang-ups. This issue is the primary reason why I am not using minikube while writing this article.

Docker Desktop

Install

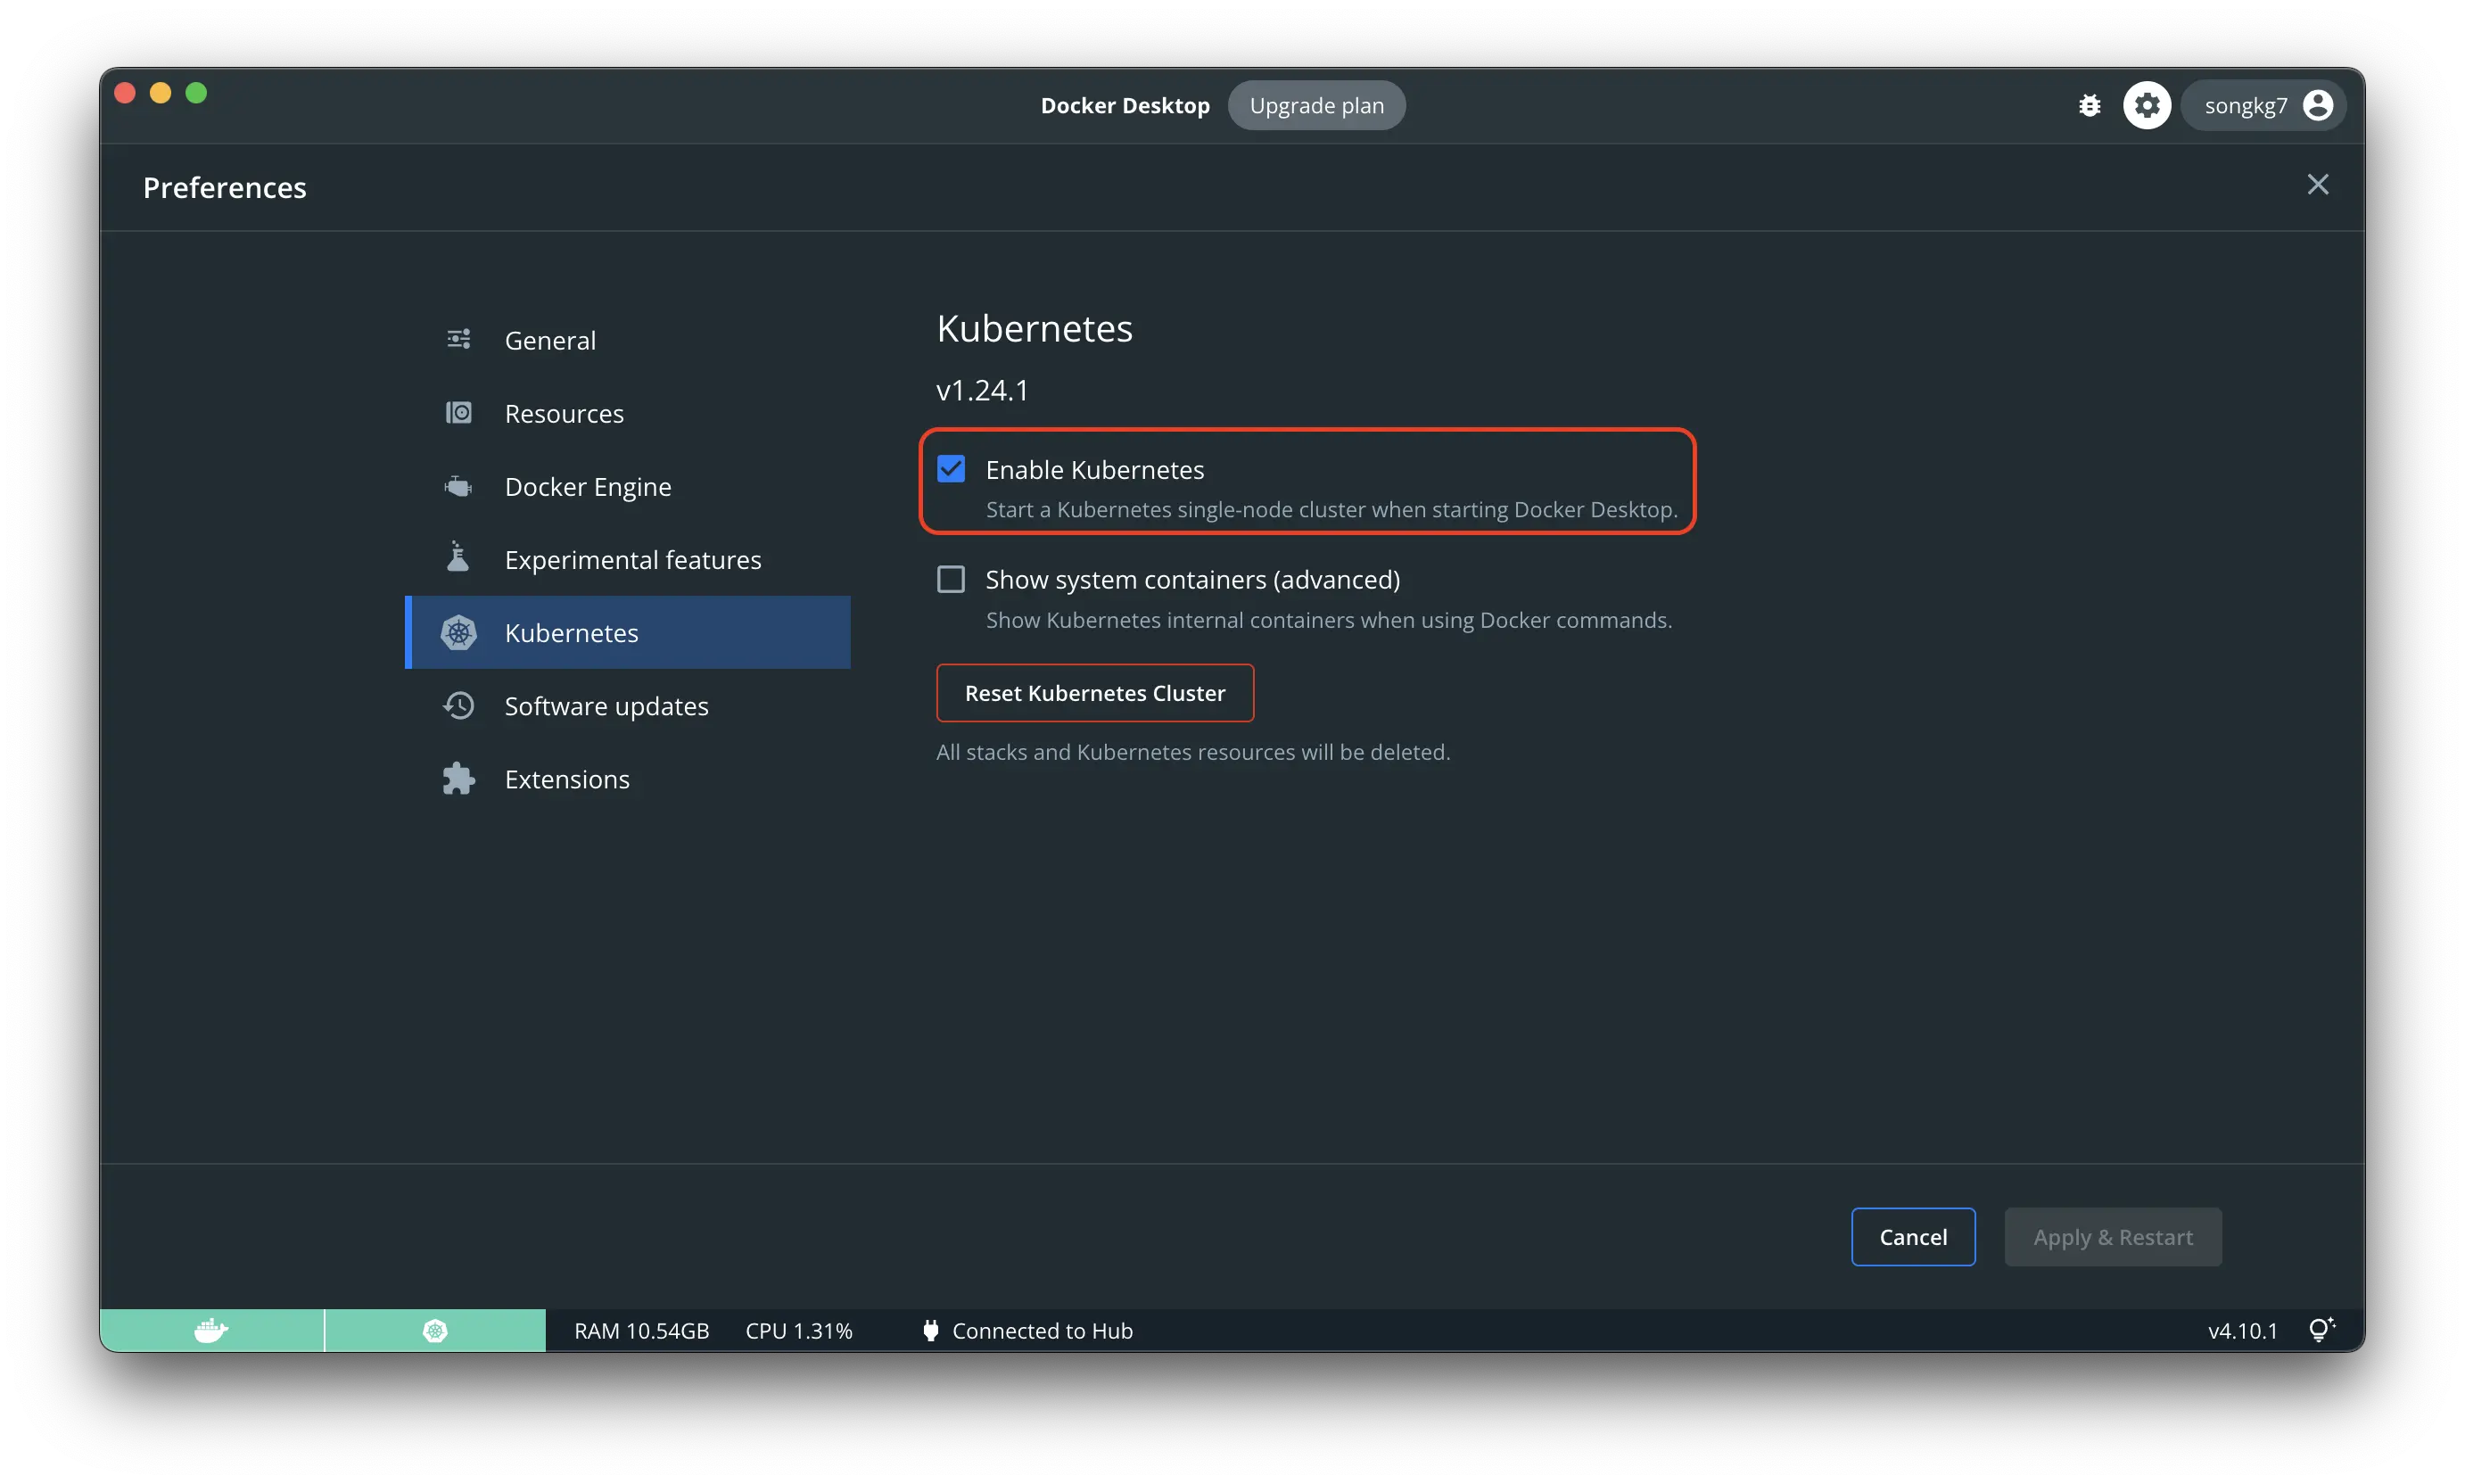
Simply activate Kubernetes from the Docker Desktop menu.

enable

Dashboard

The Kubernetes dashboard is not enabled by default. You can activate it using the following command:

kubectl apply -f https://raw.githubusercontent.com/kubernetes/dashboard/v2.5.0/aio/deploy/recommended.yaml

Starting the Dashboard

kubectl proxy

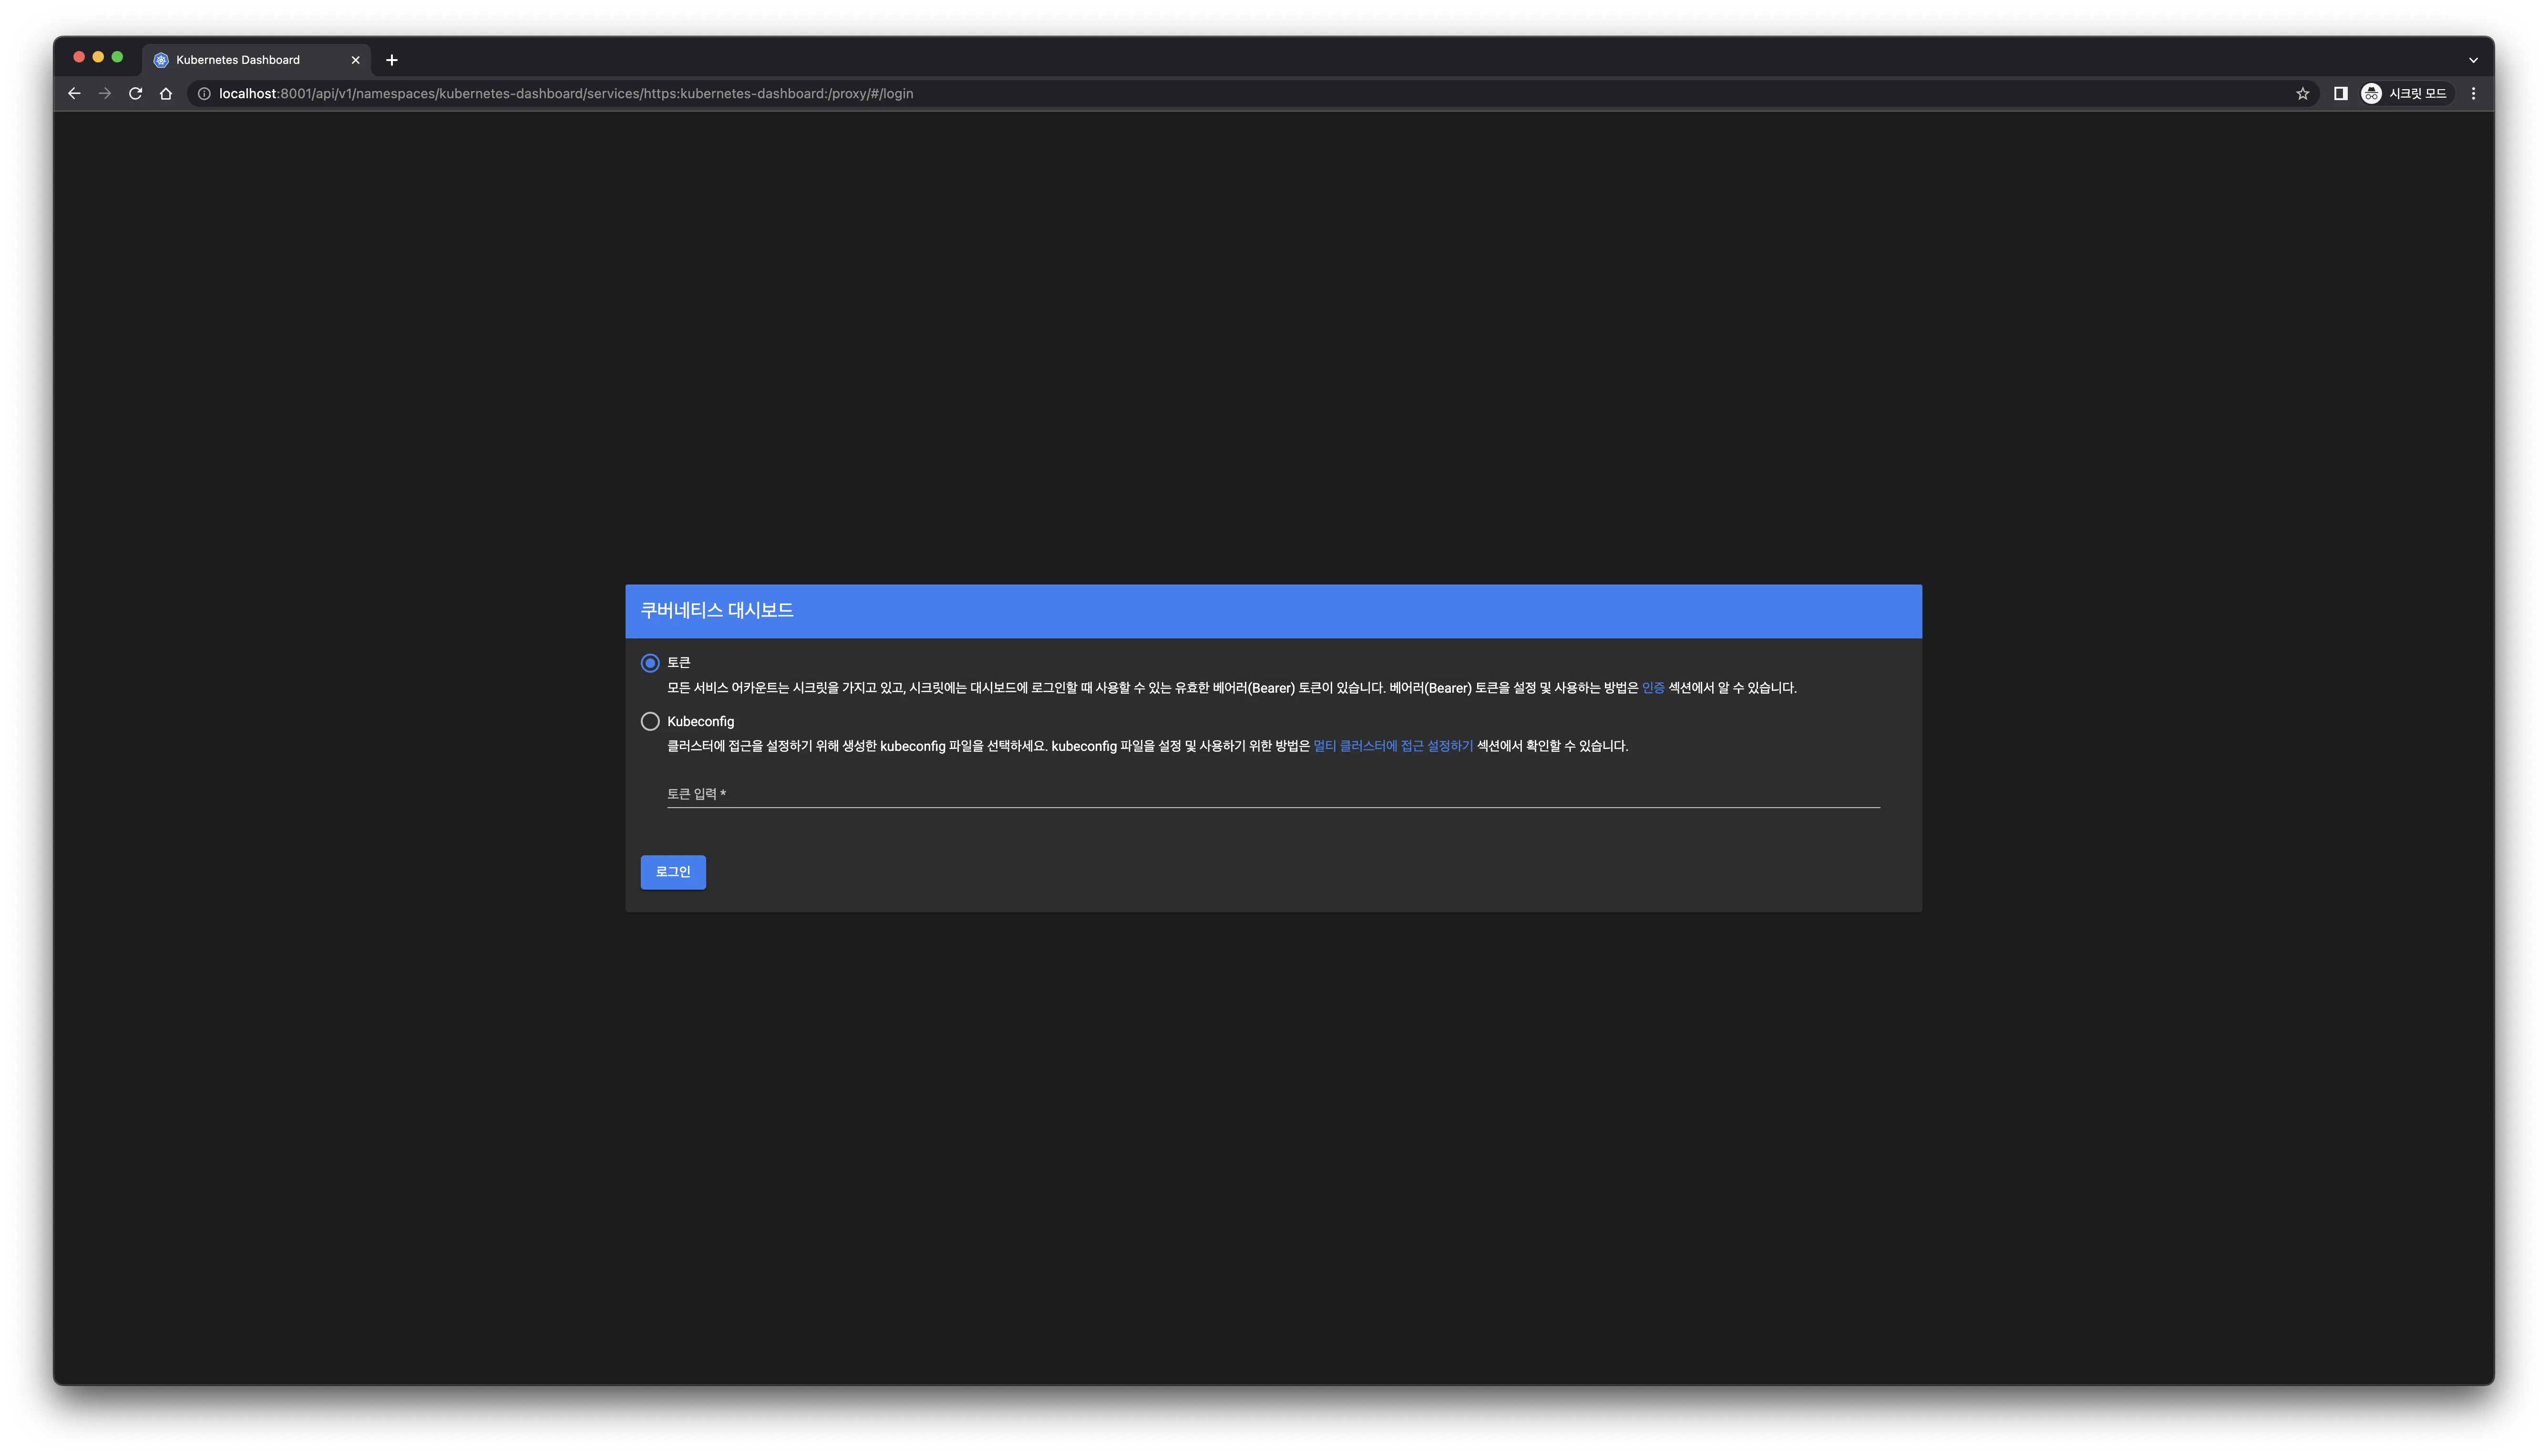
You can now access the dashboard via this link.

dashboard

To log in, you will need a token. Let's see how to create one.

Secrets

First, create a kubernetes folder to store related files separately.

mkdir kubernetes && cd kubernetes
warning

Granting admin privileges to the dashboard account can pose security risks, so be cautious when using it in actual operations.

dashboard-adminuser.yaml

apiVersion: v1
kind: ServiceAccount
metadata:
name: admin-user
namespace: kubernetes-dashboard
kubectl apply -f dashboard-adminuser.yaml

cluster-role-binding.yml

apiVersion: rbac.authorization.k8s.io/v1
kind: ClusterRoleBinding
metadata:
name: admin-user
roleRef:
apiGroup: rbac.authorization.k8s.io
kind: ClusterRole
name: cluster-admin
subjects:
- kind: ServiceAccount
name: admin-user
namespace: kubernetes-dashboard
kubectl apply -f cluster-role-binding.yaml

Create Token

kubectl -n kubernetes-dashboard create token admin-user
eyJhbGciOiJSUzI1NiIsImtpZCI6IjVjQjhWQVdpeWdLTlJYeXVKSUpxZndQUkoxdzU3eXFvM2dtMHJQZGY4TUkifQ.eyJhdWQiOlsiaHR0cHM6Ly9rdWJlcm5ldGVzLmRlZmF1bHQuc3ZjLmNsdXN0ZXIubG9jYWwiXSwiZXhwIjox7jU4NTA3NTY1LCJpYXQiOjE2NTg1MDM5NjUsImlzcyI6Imh0dHBzOi8va3ViZXJuZXRlcy5kZWZhdWx0LnN2Yy5jbHVzdGVyLmxvY2FsIiwia3ViZXJuZXRlcy5pbyI6eyJuYW4lc3BhY2UiOiJrdWJlcm5ldGVzLWRhc2hib2FyZCIsInNlcnZpY2VhY2NvdW55Ijp7Im5hbWUiOiJhZG1pbi11c2VyIiwidWlkIjoiZTRkODM5NjQtZWE2MC00ZWI0LTk1NDgtZjFjNWQ3YWM4ZGQ3In19LCJuYmYiOjE2NTg1MDM5NjUsInN1YiI6InN5c3RlbTpzZXJ2aWNlYWNjb3VudDprdWJlcm5ldGVzLWRhc2hib2FyZDphZG1pbi11c2VyIn1.RjoUaQnhTVKvzpAx_rToItI8HTZsr-6brMHWL63ca1_D4QIMCxU-zz7HFK04tCvOwyOTWw603XPDCv-ovjs1lM6A3tdgncqs8z1oTRamM4E-Sum8oi7cKnmVFSLjfLKqQxapBvZF5x-SxJ8Myla-izQxYkCtbWIlc6JfShxCSBJvfwSGW8c6kKdYdJv1QQdU1BfPY1sVz__cLNPA70_OpoosHevfVV86hsMvxCwVkNQHIpGlBX-NPog4nLY4gfuCMxKqjdVh8wLT7yS-E3sUJiXCcPJ2-BFSen4y-RIDbg18qbCtE3hQBr033Mfuly1Wc12UkU4bQeiF5SerODDn-g

Use the generated token to log in.

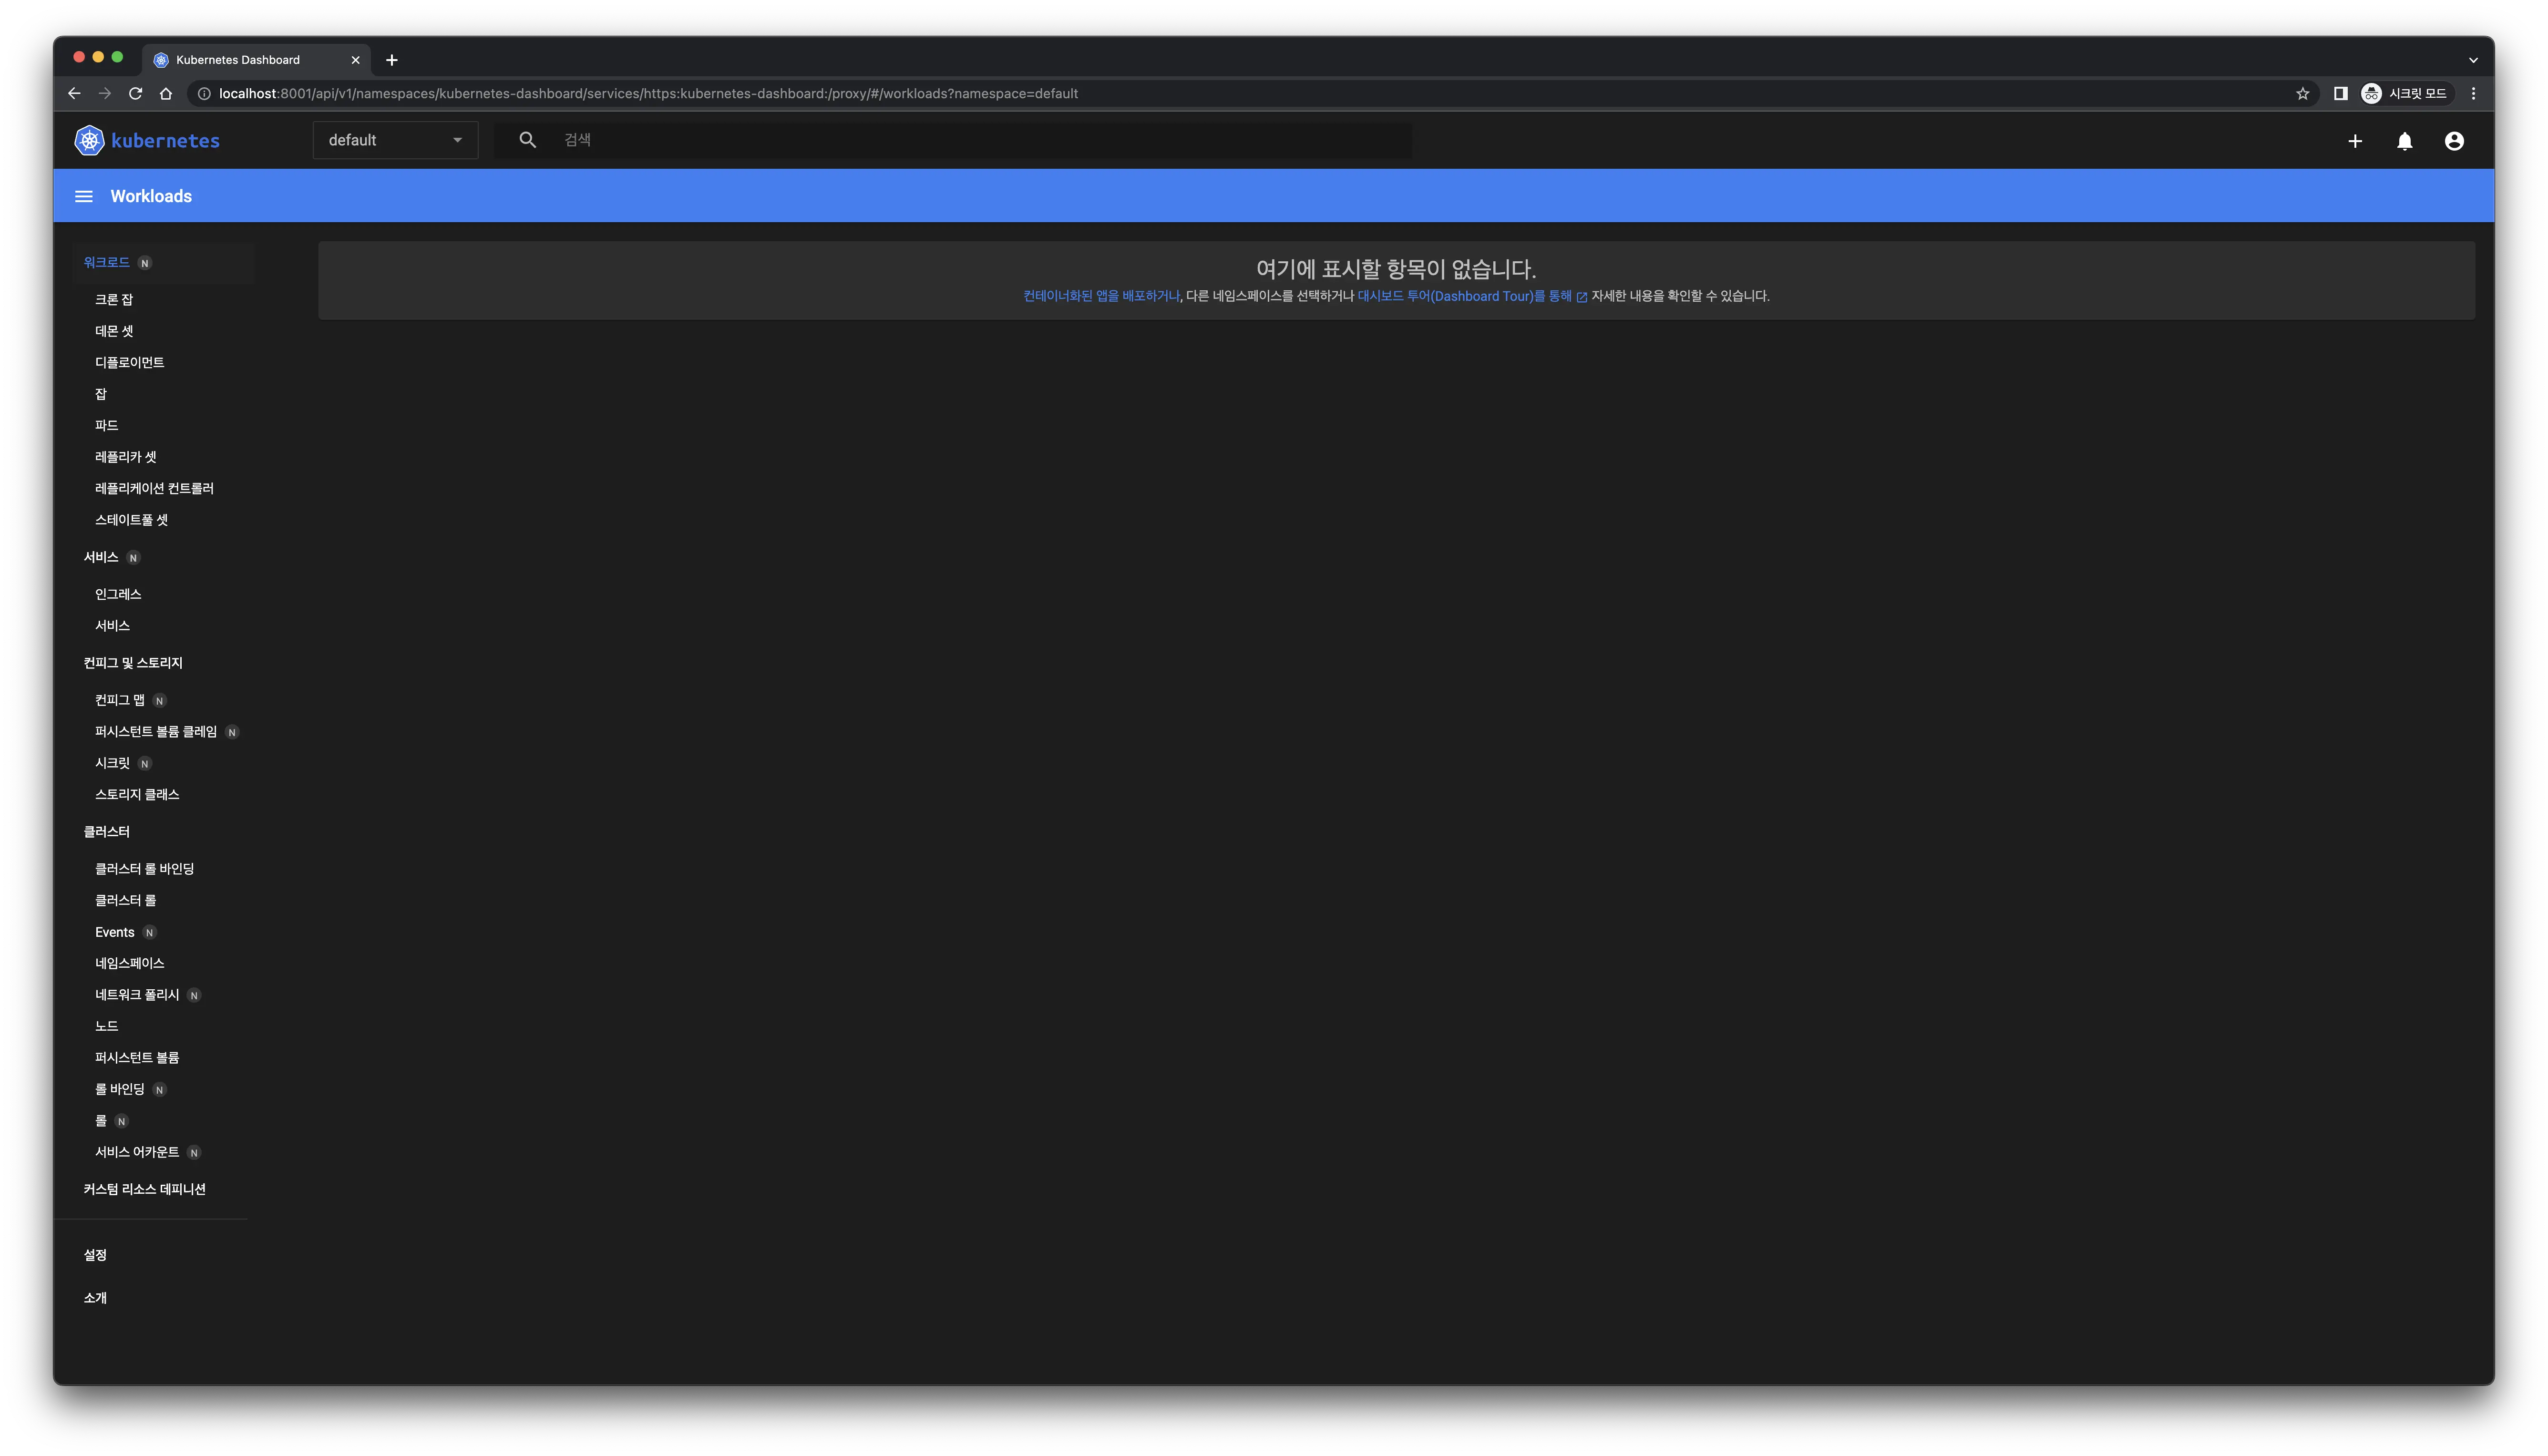
welcome-view Successful access!

Creating a Deployment

Create a deployment using an image. For this article, a web server using golang has been prepared in advance.

kubectl create deployment rest-server --image=songkg7/rest-server

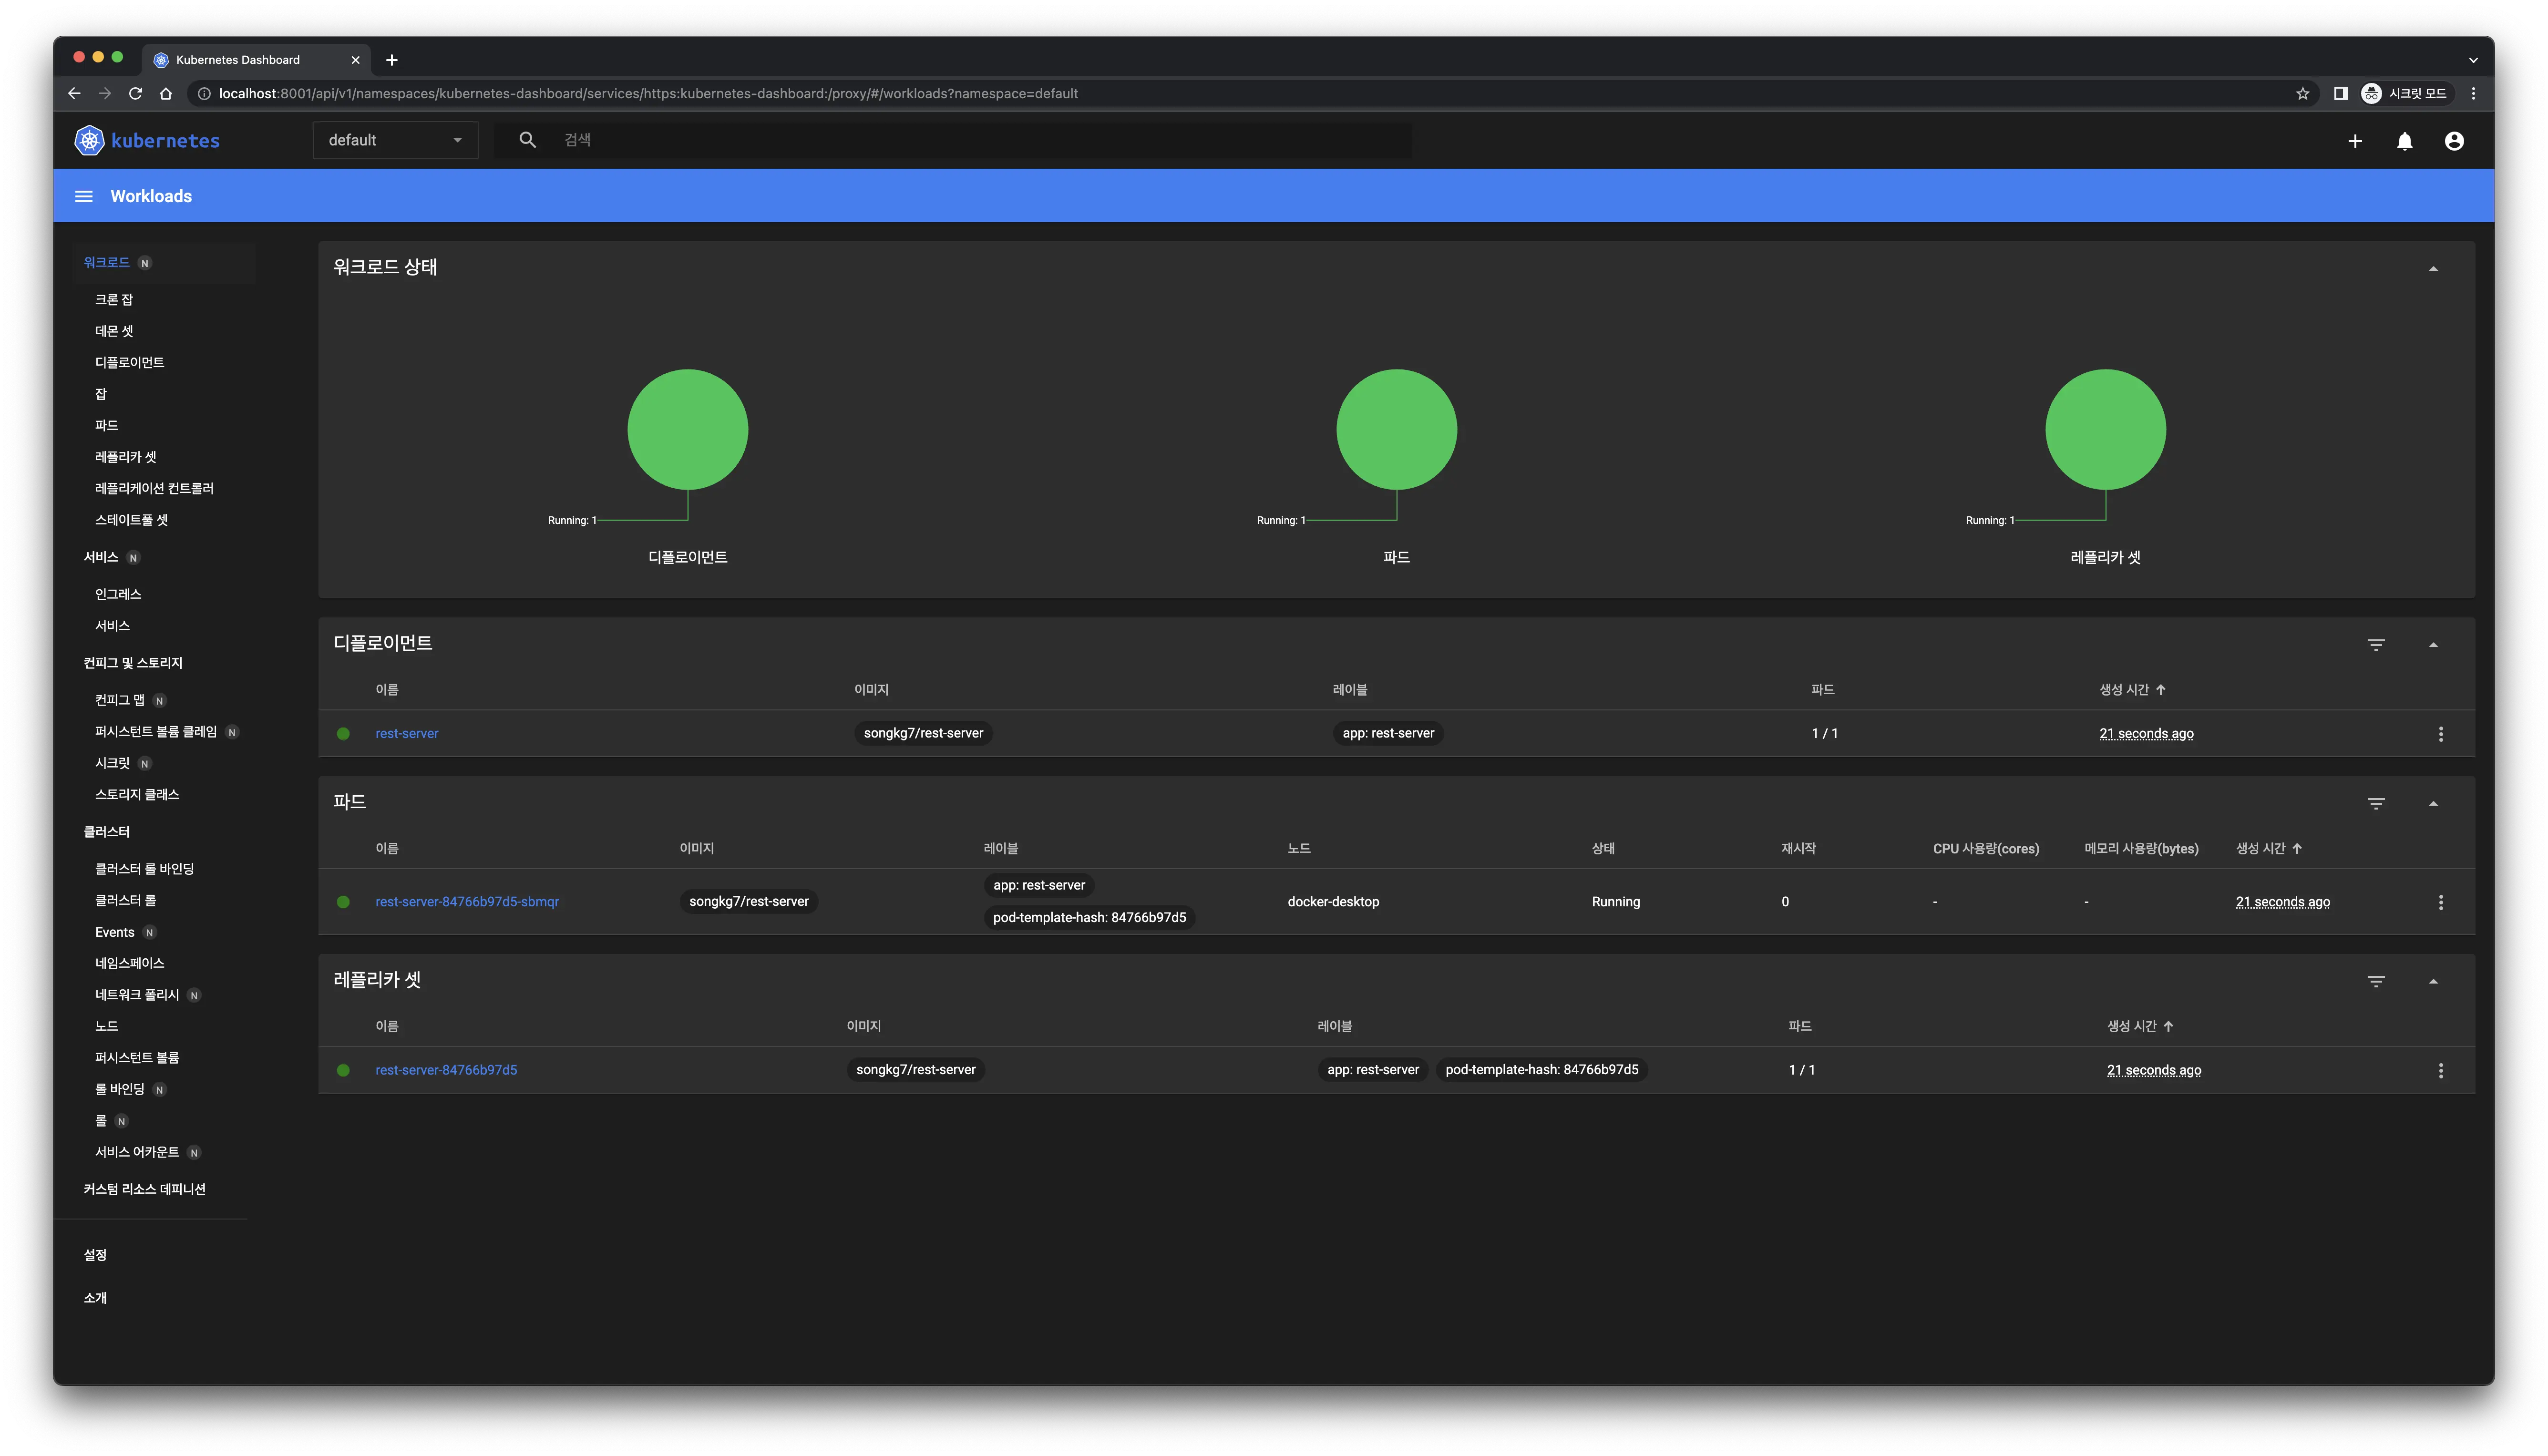
As soon as the command is executed successfully, you can easily monitor the changes on the dashboard.

create-deployment The dashboard updates immediately upon deployment creation.

However, let's also learn how to check this via the CLI (the root...!).

Checking Status

kubectl get deployments

get-deployment

When a deployment is created, pods are also generated simultaneously.

kubectl get pods -o wide

get-pods

Having confirmed that everything is running smoothly, let's send a request to our web server. Instead of using curl, we will use httpie1. If you are more comfortable with curl, feel free to use it.

http localhost:8080/ping

error

Even though everything seems to be working fine, why can't we receive a response? 🤔

This is because our service is not exposed to the outside world yet. By default, Kubernetes pods can only communicate internally. Let's make our service accessible externally.

Exposing the Service

kubectl expose deployment rest-server --type=LoadBalancer --port=8080

Since our service uses port 8080, we open this port. Using a different port may result in connection issues.

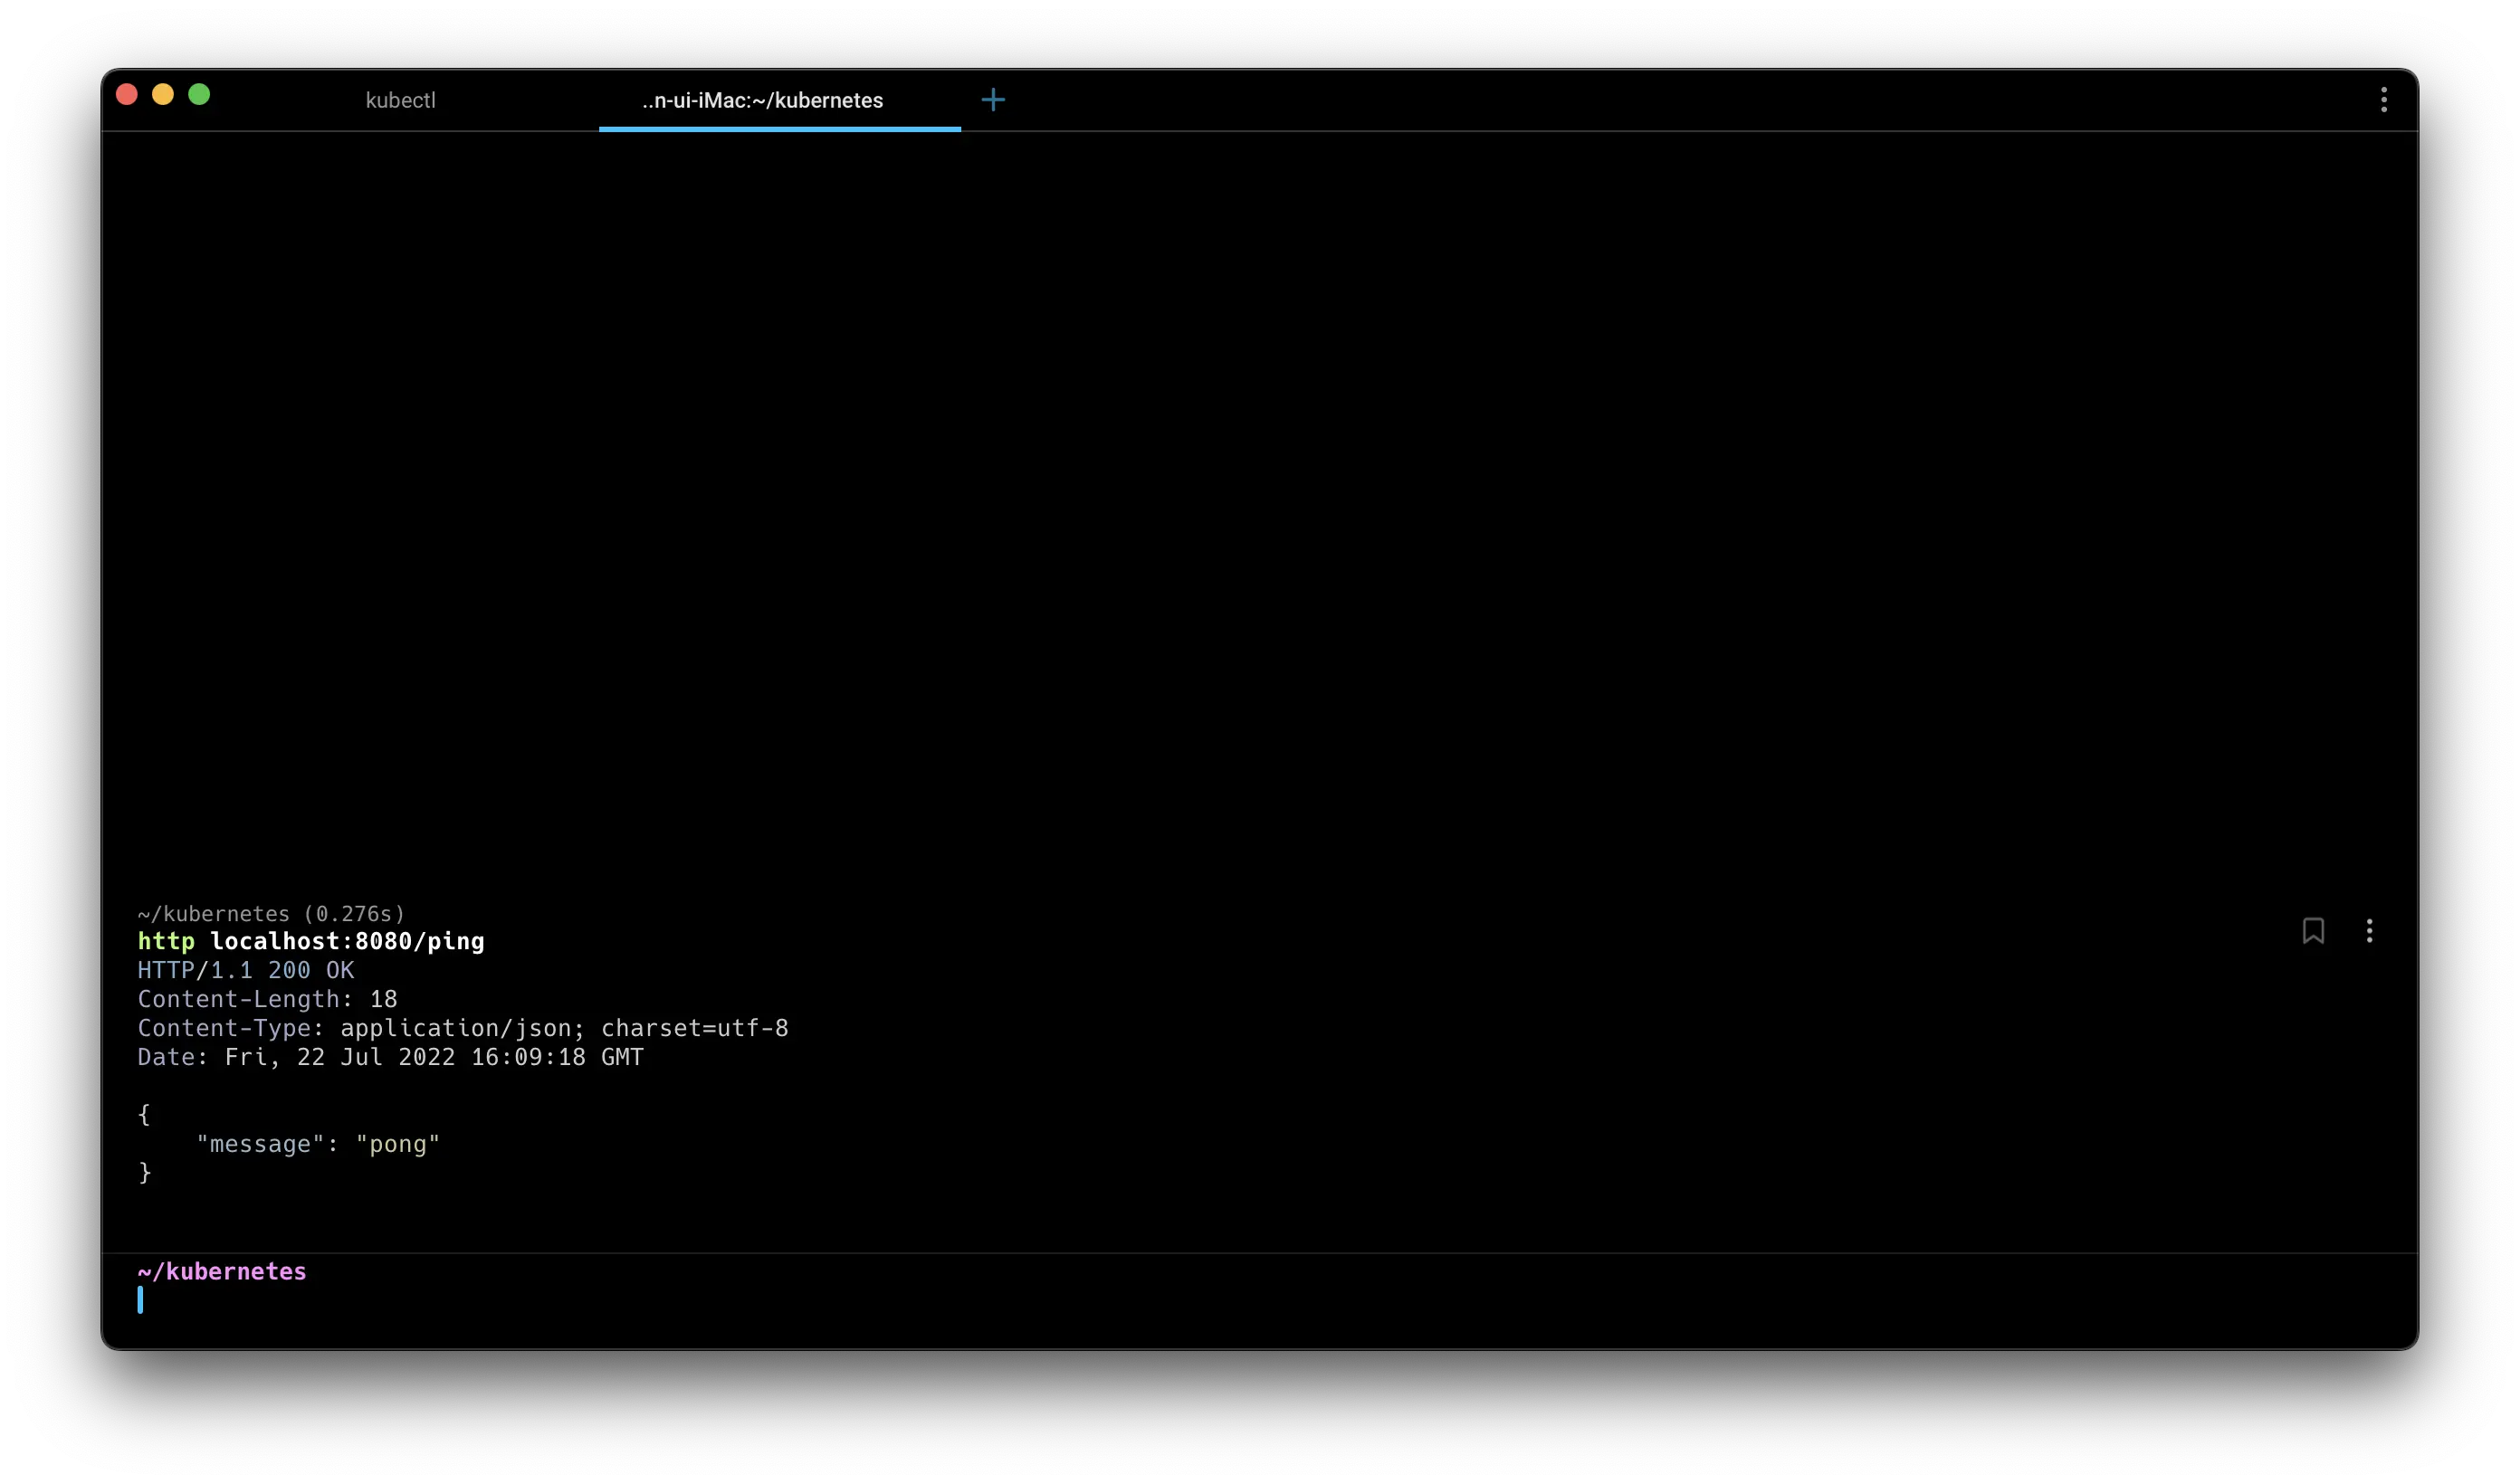
Now, try sending the request again.

http localhost:8080/ping

200

You can see that you receive a successful response.

Reference


Footnotes

  1. Elegant httpie